> ## Documentation Index
> Fetch the complete documentation index at: https://docs.upio.dev/llms.txt
> Use this file to discover all available pages before exploring further.
# Getting Started
> How to create your own custom UI via the seliware API
**Prerequisite** You should have downloaded Visual Studio with the **.NET desktop developement** extension, and have a basic understanding of C#.
# Creating your project
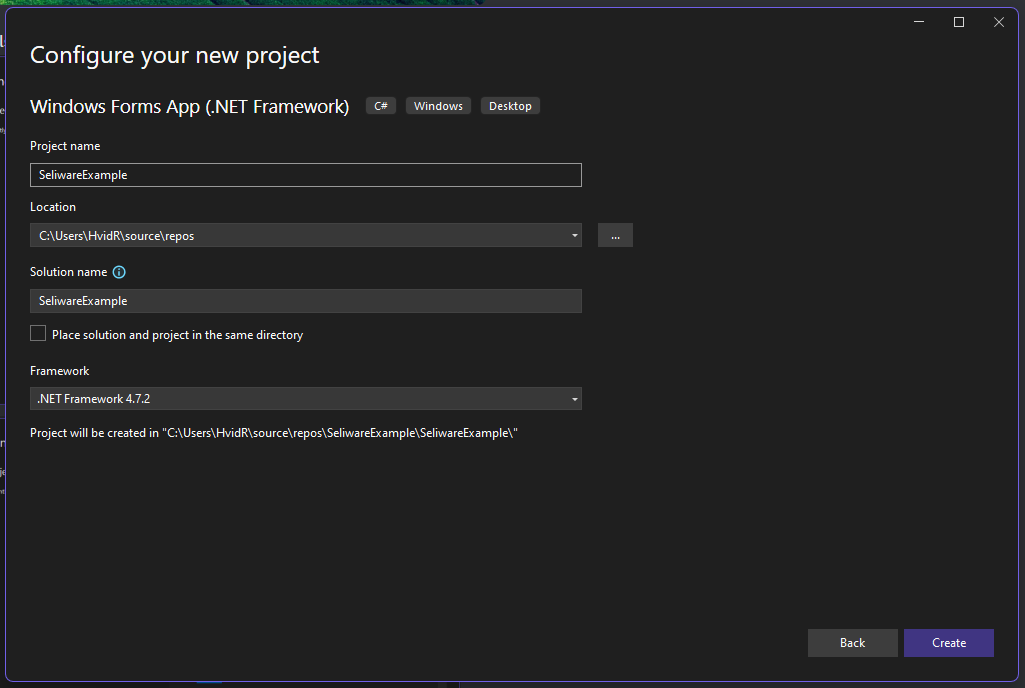
First create a new project in Visual Studio, and select **Windows Forms App (.NET Framework)**. Name your project, and click **Create**.
### Changing Project Architecture
In the Solution Explorer, right click on your project and click on **Properties** at the bottom. In the **Build** tab, change the **Platform target** to **x64**.
### Making your UI use administator privileges
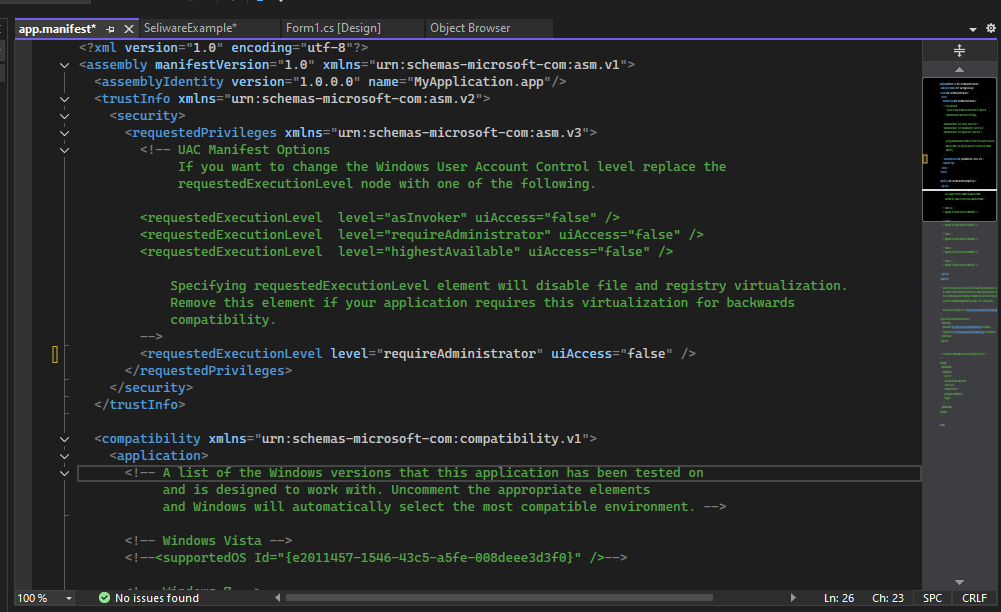
In the Solution Explorer, right click on your project and hover over "Add" then click on "New Item". Select "Application Manifest File (Windows Only)" and click "Add". In the manifest file, change the `requestedExecutionLevel` to `requireAdministrator`.
```diff theme={null}
-
+
```
## Downloading Dependencies
### Newtonsoft.Json.dll and websocket-sharp.dll
The seliware API depends on `Newtonsoft.Json.dll` and `websocket-sharp.dll`.
You may download the dependences using these links (or by searching for them on the internet): [Newtonsoft.Json.dll](https://www.upio.dev/Newtonsoft.Json.dll) and [websocket-sharp.dll](https://www.upio.dev/websocket-sharp.dll).
### Seliware API
The seliware API dll is found in [https://bitdancer.pro/](https://bitdancer.pro/)
## Adding Dependencies to your project
To add these dependencies to your project, right click on your project in the Solution Explorer and hover over "Add" then click on "Reference" or "Project Reference".
From there, click on "Browse" and select the downloaded dependencies.
Then finally click on "OK" to add the dependencies to your project.
## Using the seliware API
Congratulations on setting up your project! Now you can start using the seliware API to create your own custom UI.
Find the Methods and Properties of the API in the [usage section of the documentation](usage).
### Frequent Issues
1. **Assembly not found exception**
This Occurs when the dependencies are not added to the project correctly. Make sure you have added the dependencies to the project correctly. If it is added correctly, go to the output folder of your project and add the dependencies in the root folder of the project (where the main `.exe` file is in).
2. **API not working**
There are several reasons why the API may not work, but make sure that you initialized Seliware via `Seliware.Initialize();` (for more info check [usage](usage)).
3. **Unable to test the UI / Debugger detected error**
The Seliware API is not able to run in the Visual Studio debugger. To test your UI, you must run the `.exe` file in the output folder of your project. If you are unable to run the `.exe` file, make sure that the dependencies are in the root folder of the project.